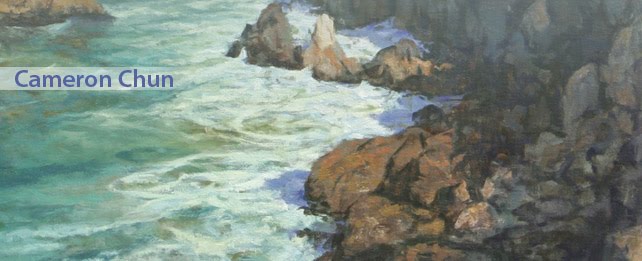
I always find ocean water a challenge to paint, so here I am doing my best to simplify what I see. I don't always follow the same approach to painting but I do use a few fundamental techniques the majority of the time. Anyone who paints outdoors knows that the light is constantly changes, which meant that I had to move my easel several times during this painting to escape the glare on my canvas panel. For this reason, the colors in the photos will vary some.
I start by thinning out my oil paint with turpenoid and create a very simple line drawing. First, I focus on the biggest or most important shapes. I also consider the positive & negative shapes to help with composition and balance.
Next, I quickly block in some color and value with thin washes to get rid of the white of the canvas. When painting water, I think of three layers- top, middle and bottom. I put down the bottom color first. Since this is painted in oils, whatever color I choose for the bottom can affect the middle and top layer of paint, especially if you scrub or mix your paints while applying them to the canvas. Lightly mixing the bottom layer with the middle layer can create really nice effects. When it does not work, I'll scrape that section of oil paint off and start painting again until it feels right or until I run out of time.
From here, I'll put down some color notes and values in the larger shapes to give me a sense of what the finished painting could look like. This can take a few tries to get the right relationship between colors and values. Once I have that, then I start adding the finer details. I am very careful not to change the colors or values set up in the previous step because if I do, I end up "chasing" the continually changing light, value and color, which can result in a muddy, unfinished painting.
As the painting evolves, I make color adjustments to prevent certain areas from looking too flat or homogenous. I closely observe the scene to understand which edges need to be softened. In this case, water will obviously feel softer than the hard rocky surface.


4 comments:
Thanks Cameron, for sharing the steps you use to capture water - it is very helpful!
Thx Janice!! I'm glad you found it useful. I hope to see you at the next paint out.
Wow, Cameron, perfect timing, haha. I was painting today and when you pointed out the part about "chasing" it made perfect sense. Thanks for the steps and tips. :D
Also, thanks a lot for the reply about painting styles.
Hey Jonathan, Thanks for stopping by. I'm glad this post was helpful. It's good to see you painting over the summer.
Post a Comment